Photographing Akaka Falls: Where to Stand and When
The falls are easy to reach and hard to shoot well. Here is where I put my guests, what time I put them there, and how we keep the lens dry.
 Verified by Kekoa Kalani, Akaka Falls tour guide and island nature specialist
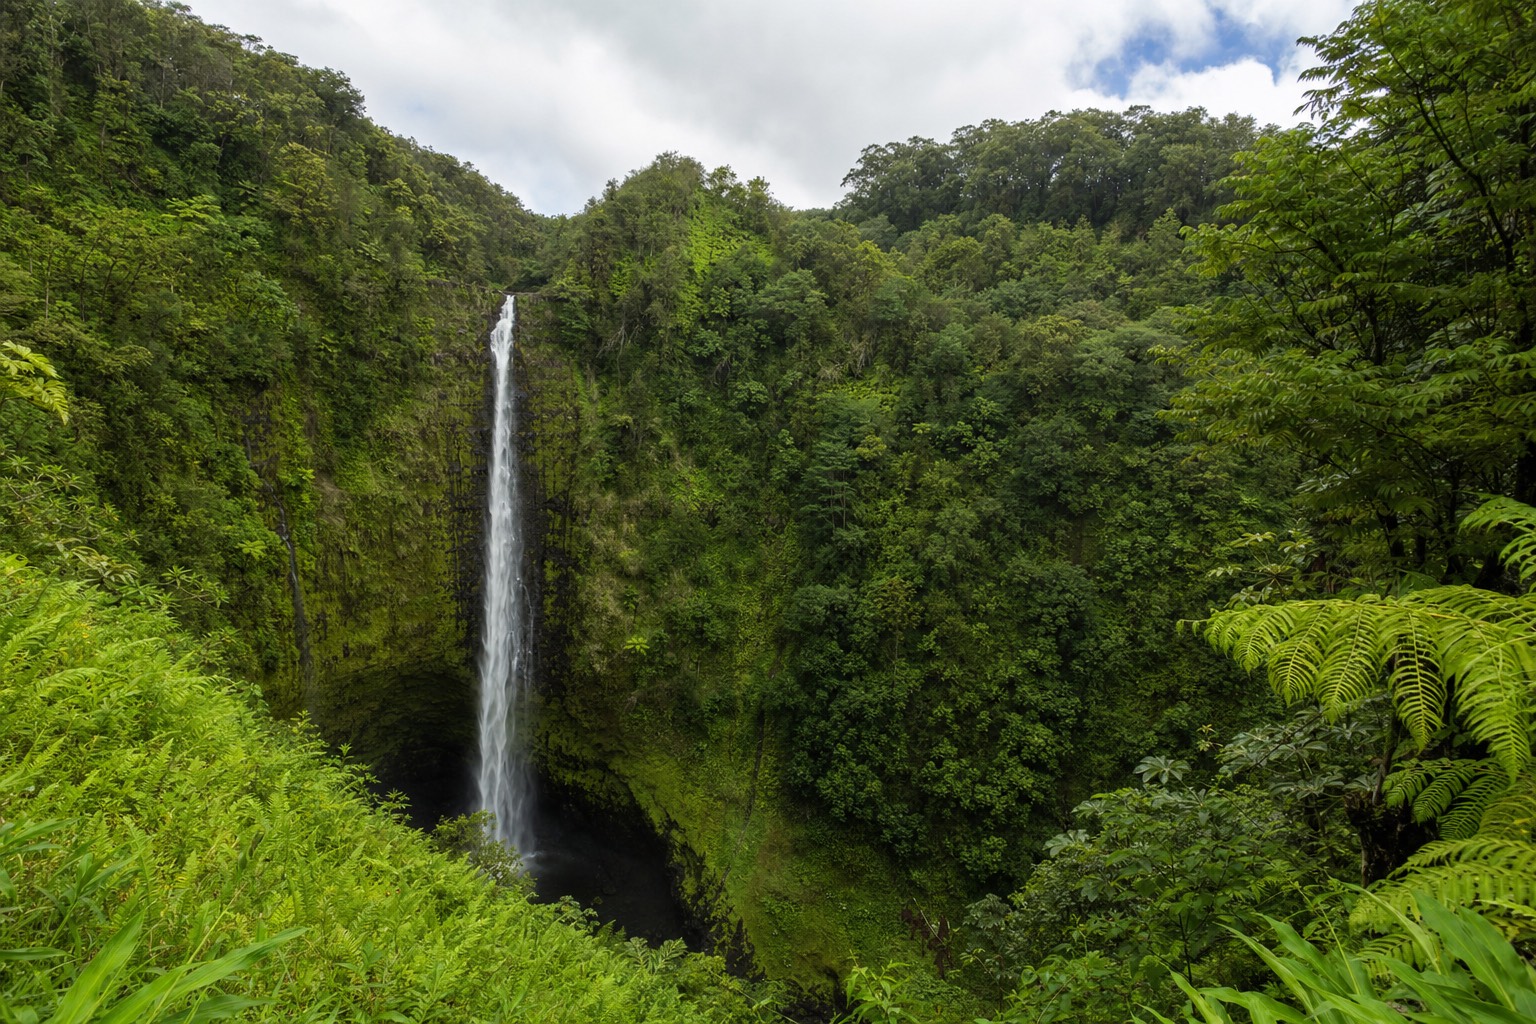
Short answer
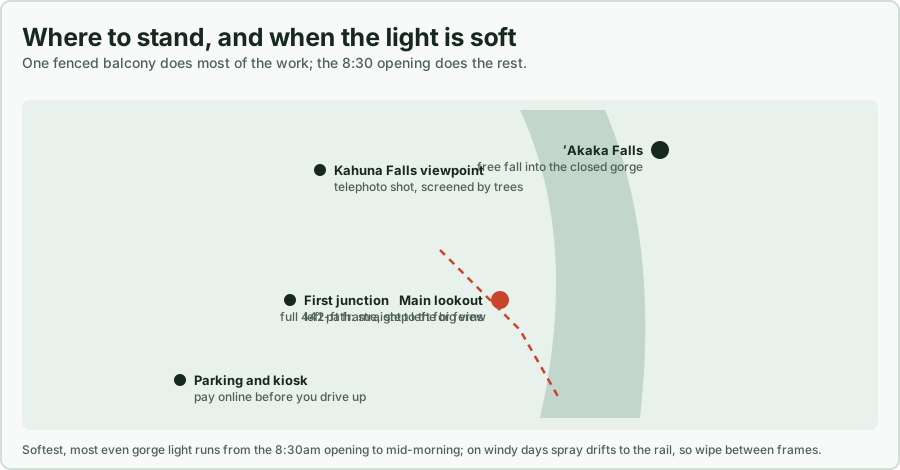
Shoot from the fenced main lookout on the loop trail, ideally between 8:30am opening and mid-morning while the gorge light is soft and even. Bring a microfiber cloth and a slow shutter for silky water. The 0.4-mile loop also gives you a partial view of Kahuna Falls.
Spray reaches the main lookout on windy days. Not much, just enough to dot a filter in the thirty seconds it takes to frame a shot, and most people never notice until they review their photos at dinner and every frame carries the same soft grey smudge in the same corner. I have guided visitors to ʻAkaka Falls since 2015, professionally since 2018, and the single most common thing I fix on the trail is not composition. It is a wet front element.
The good news is that this is one of the most cooperative big waterfalls in Hawaii. The drop is 442 feet of free fall into a stream-eroded gorge on Kolekole Stream, the loop trail is a paved 0.4 miles, and the main viewpoint frames the entire falls without a scramble, a rope, or a wet boot. Nobody has to earn this shot with a two-hour climb. What you do have to manage is light, water in the air, and a scene with more contrast in it than the sensor wants to hold.
So this is the whole working method, in the order you will need it: where to put your feet, what the light does hour by hour between the 8:30am opening and the 5:00pm close, how to expose a wet gorge, how to beat mist, what shutter speeds do to a fall this tall, the second waterfall almost everyone walks past, the bamboo and banyan stretches that save a flat day, and what to carry so none of it fogs up on you. Over a thousand travellers have walked this loop with me. Most of the useful lessons came from watching what went wrong in their frames, not mine.
Where do you stand to get the shot?
The fenced main lookout is the primary position, with a clean elevated view of the full 442-foot drop across the gorge. Work three or four steps either side of center rather than planting yourself in the middle. Every shot happens from the paved path, so there is no lower angle worth hunting for.
The park makes that decision for you, in a way I have come to appreciate. The gorge below the falls is closed off and the loop is fenced along its whole length, so there is no secret angle down by the water and nobody should be scrambling to look for one. What you get instead is a raised natural balcony that sits almost dead level with the middle of the drop. From the main lookout the falls fill a vertical frame top to bottom, the plunge pool sits in the lower third, and the gorge walls hand you dark green edges on both sides for free.
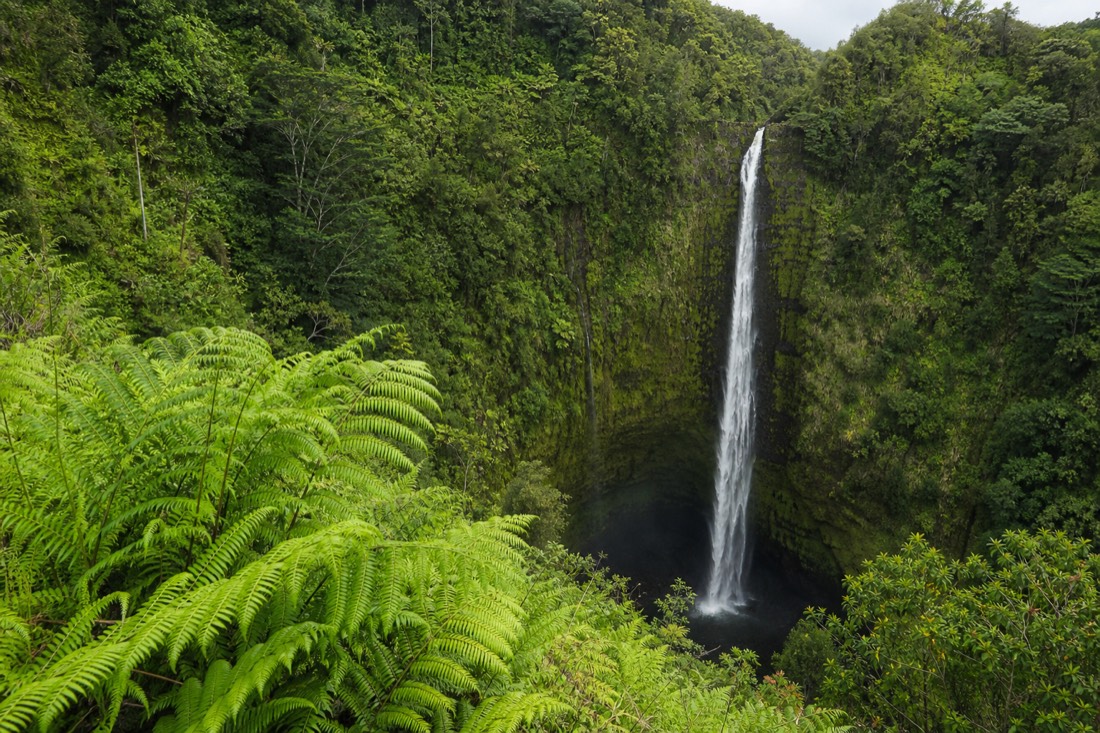
Working the railing is the skill nobody teaches. A step to the left usually lets you pull a hapuʻu fern frond into the lower corner as foreground, and that one move does more for a waterfall photograph than any filter you own. Foreground gives the eye somewhere to enter, it sets scale, and it separates your frame from the ten thousand centered postcards taken that same week. A step to the right tightens the composition on the water column and drops the fern out, which is what you want when the water is heavy after rain and the column itself is the subject.
Height matters too. Raise the camera above the rail and you flatten the foliage into a green wall. Drop it to chest height or lower and the nearest fronds go soft and large, which reads as depth. If you are shooting a phone, hold it low and close to the leaves rather than up at eye level, because the wide phone lens exaggerates near-far separation and rewards you for getting close to something.
For anyone on a tight clock, the state's own routing helps. From the first trail junction the left, or south, path is the marked shortcut straight to the ʻAkaka Falls view. Take it, shoot the headline frame while your window is intact, then walk the rest of the loop if the schedule allows. Cruise passengers coming up from town should read the Hilo port timings before deciding how much loop they can afford, and anyone unsure how long the whole thing takes will find honest numbers in the time needed guide.
Here is the shot list I run with guests, in the order I set them up.
| Shot | Position | Best window | What makes it work |
|---|---|---|---|
| Full-drop vertical | Center of main lookout railing | 8:30am to 10:30am | Falls read top to bottom, plunge pool included |
| Fern-framed wide | Two to three steps left of center, camera low | Any time, best under cloud | Frond foreground sets scale and depth |
| Tight water column | Right end of the lookout, zoomed in | Mid-morning | Isolates the texture inside the falling water |
| Gorge-wall detail | Anywhere along the rail, 100mm and up | After rain | Wet basalt and dripping ferns, no sky in frame |
| Kahuna cascade | Marked viewpoint, north side of the loop | Morning, after rain | Tiered water through a gap in the trees |
| Green tunnel | Bamboo stretch of the loop | Flat overcast | Saves a day when the falls light is harsh |
| Trail context | Stair sections of the loop | Any time | A walker on the path gives human scale |
What does the light do between 8:30am and 5:00pm?
Be at the gate for the 8:30am opening. The falls sit deep in a stream-eroded gorge, which acts as a light trap, so the first two hours give you soft even illumination with no harsh contrast. By midday, direct sun burns the white water while the gorge walls stay black. Late afternoon softens again but crowds thicken.
A gorge is a box with one open side. Early in the morning the sun has not climbed high enough to reach into it, so the entire scene sits in open shade, lit by a big soft sky rather than a point source. That is the whole reason the opening hour matters. Water reads as detailed white rather than a blown highlight, greens go rich instead of glary, and the dynamic range of the scene drops into something your sensor can actually hold in one exposure.
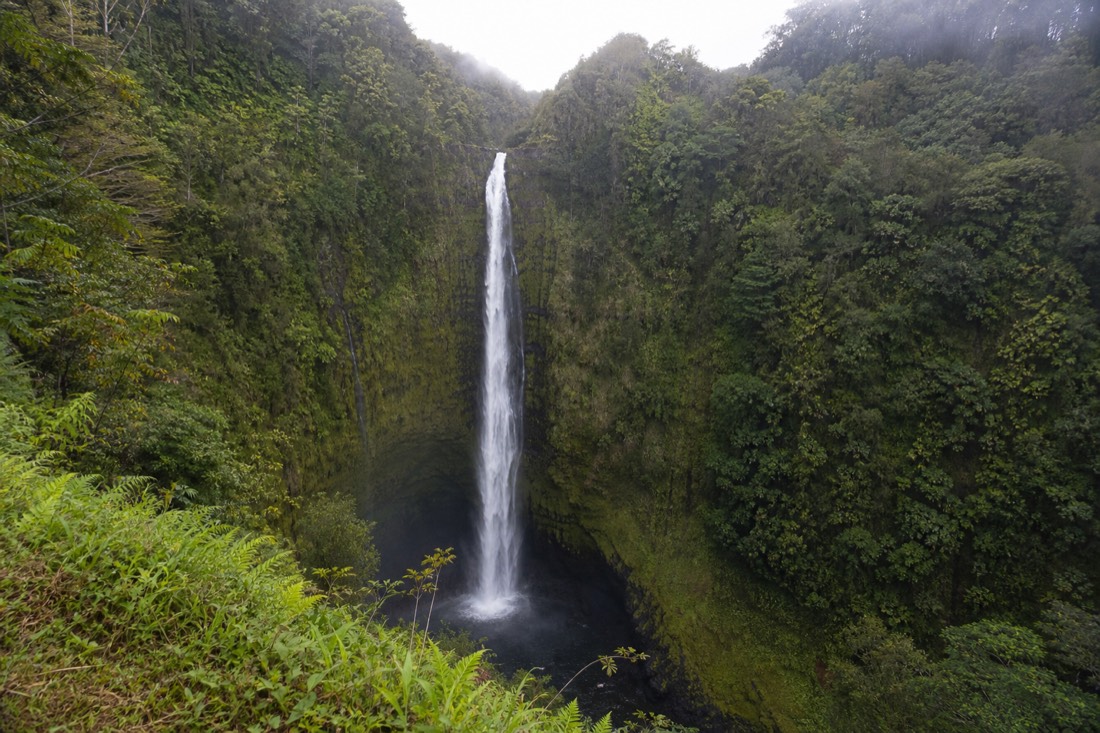
Then the sun climbs. Somewhere in the late morning on a clear day it starts raking into the upper gorge, and the split arrives fast: the crown of the falls catches direct light while the base is still in shadow, five or six stops apart. You can still make a picture out of that. You will be bracketing exposures or accepting a burned-out top, and neither is as good as simply having arrived earlier.
Midday is the hour I steer people away from if they have any choice at all. Overhead sun puts the hardest edge on the water and the deepest black in the gorge, and it also happens to be when tour buses and rental cars converge on a small lot. Two problems, one clock. If midday is genuinely your only slot, shoot the forest instead: the bamboo, the banyan roots, the fern understory. All of it works under sun that ruins the falls.
Afternoon light drifts back out of the gorge and the contrast eases again from around three o'clock. It never gets as clean as morning because the air has heated and the trades have usually built, which means more mist drifting at the railing, but a late frame beats no frame. Gates close at 5:00pm and you want to be walking out, not walking in, at 4:30. There is more on months, rainfall and crowd rhythm in the best time to visit guide, and a real hour-by-hour account of one such morning in a morning at the falls.
| Window | What the gorge is doing | Best use of it | Watch for |
|---|---|---|---|
| 8:30 to 9:30am | Full open shade, no direct sun | The headline frame, slow shutters | Cool colour cast, warm it slightly |
| 9:30 to 10:30am | Sky brightening, still even | Second angles, fern foregrounds | First buses arriving |
| 10:30am to noon | Sun starting to rake the crown | Bracketing, tighter crops low on the drop | Clipped highlights at the top |
| Noon to 2:00pm | Hard overhead contrast | Bamboo, banyans, forest detail | Busiest railing of the day |
| 2:00 to 3:30pm | Contrast easing, trades building | Return to the falls, mist frames | Wind-driven spray on the lens |
| 3:30 to 5:00pm | Soft again, light dropping | Long exposures, moody green | Gates close at 5:00, leave a margin |
An hour at the falls is the difference between one lucky frame and a set you are happy with. Most bus itineraries give you thirty-five to forty minutes here, which is enough to see it and not enough to work it. If you are staying Hilo side and want the long version, the Hilo day that allows a full hour at the falls before it moves on to the volcano is the one I point photographers toward, and you can see the dates and what the day covers before you commit.
How do you expose a wet gorge without wrecking the water?
Meter for the white water, not the scene. Bias a third to two-thirds of a stop under, watch the histogram for the right-hand wall, and let the greens sit dark in the file. Falling water clips permanently once it goes pure white, while a murky shadow recovers in seconds on the edit.
Cameras want to average a scene, and this scene is not average. You have a bright vertical ribbon of moving white against dark wet basalt and deep green. Left alone, matrix or evaluative metering lifts the whole frame to compensate for all that dark, and the ribbon goes to paper. Once a highlight is at 255 across all three channels there is no detail hiding in there. Nothing brings it back, no slider, no raw file.
So the habit is simple and you build it in five minutes: shoot, glance at the histogram, look only at the right edge. If the data is climbing the wall, dial exposure compensation down and shoot again. On most bodies the falls sit comfortably at minus one third to minus two thirds on a bright morning, and further down if the sun has started raking. Highlight-weighted metering, if your camera has it, does most of this for you and I use it here.
The greens deserve a word too, because they are the second thing that goes wrong. Every leaf in that gorge is wet, and wet leaves are mirrors. Under a bright sky the whole forest picks up a milky sheen that flattens colour and washes out the texture in the ferns. A circular polarizer kills a good chunk of that specular glare and it is the one filter I still bother to carry here. Turn it slowly and watch the greens deepen. Do not crank it to maximum on a wide lens, because you will get an uneven sky and an odd dark band where the polarisation angle shifts.
Colour temperature is worth a thought as well. Open shade is blue, so an auto white balance often leaves morning frames looking cold and slightly lifeless. Nudge the temperature warmer, or set a cloudy preset and forget it. Shoot raw if your camera or phone offers it, because the room you gain in shadow recovery on a scene like this is the difference between a flat file and one that opens up.
One more thing about dynamic range: the gorge is not a single lighting situation, it is two. The far wall and the falls belong to the sky. The near foliage on your side of the railing belongs to the shade. If you expose for one you sacrifice the other, and the honest fix is composition rather than technology. Crop the brightest sky out of the frame and half the problem disappears.
How do you keep mist off the lens?
Keep the lens capped until the moment you shoot, turn your back to the falls between frames, and wipe with a dry microfiber cloth before every sequence. Carry two or three cloths in a zip bag and keep wet ones separate. In real rain, use a cover or shoot from under an umbrella.
Mist here is sneaky rather than dramatic. On a still day you can stand at the railing for ten minutes and feel nothing at all. When the trade winds push up the gorge, a fine drift reaches the lookout, and it is fine enough that your face barely registers it while your front element collects a hundred tiny droplets, one frame at a time. The result is not an obvious blur. It is a soft low-contrast haze, usually worst in whichever corner faced the falls, and it looks in the field like nothing is wrong.
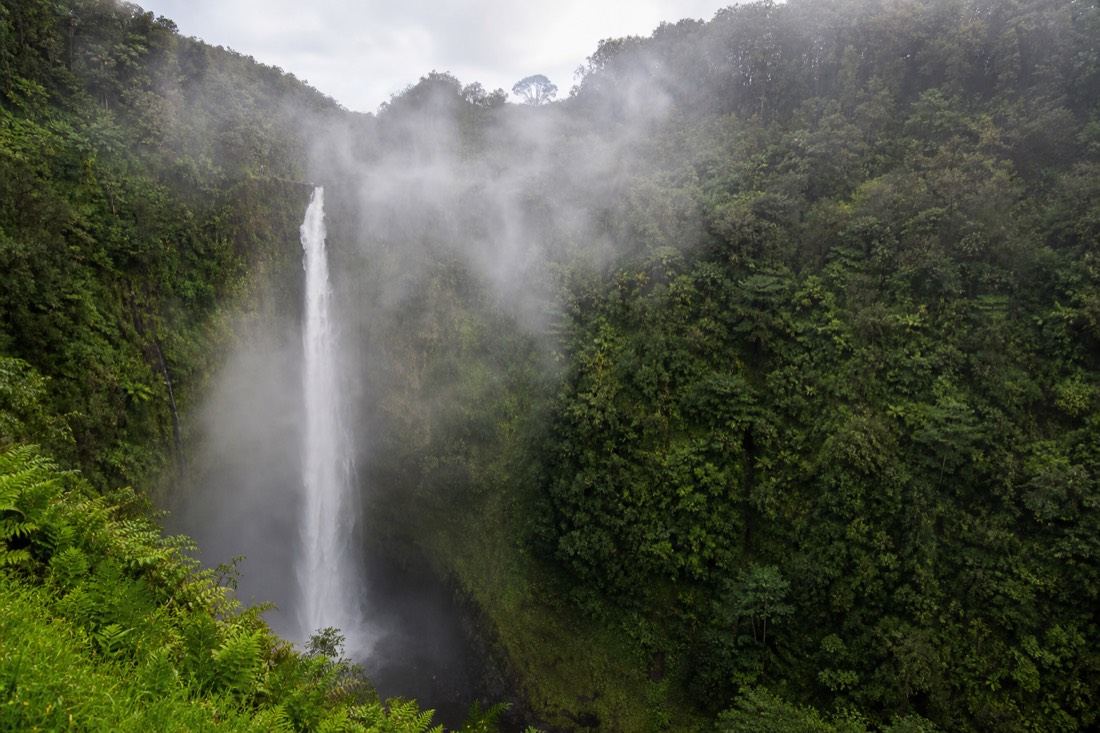
The routine I have drilled into a thousand-plus guests: cap on while walking, cap off, wipe, shoot a burst, cap on. Review your images facing away from the water. It looks slightly ridiculous and it works. The wipe has to happen immediately before the burst, not two minutes earlier, because two minutes is enough exposure for the drift to rebuild.
Cloth management is the part people get wrong. One cloth goes damp within a few wipes and after that you are smearing rather than clearing, spreading a thin film across the glass that catches every bit of stray light. Carry three. Keep dry ones in one pocket and used ones in a zip bag, and never wipe with a shirt hem that has already been rained on. If a droplet has dried on the glass and left a mineral ring, a breath of warm air on the element before the wipe lifts it much better than dry rubbing.
A lens hood is quietly the most useful anti-mist tool you can carry, because it puts three or four centimetres of physical shade between drifting spray and the glass and it costs nothing to leave on. Filters help too, in the sense that a cheap protective filter is far easier to wipe repeatedly than a coated front element, and much cheaper to replace when you eventually scratch it.
Read the wind before you set up. If the trades are pushing hard up the gorge and the drift is constant, shift a few steps along the railing to where the vegetation breaks the flow, or shoot on the exhale between gusts. Mist is also a subject in its own right. A long lens through a veil of spray, with the water column half hidden, is a better photograph than the clean version on plenty of mornings.
What shutter speed suits a 442-foot free fall?
Start at a quarter second at f/8 to f/11 and the lowest ISO for silky water, or 1/500 and faster for texture and frozen droplets. A fall this tall accelerates visibly, so one shutter speed renders the crown and the base differently. Brace on the railing when you have no tripod.
Height changes everything about shutter choice. On a short cascade the water moves at roughly one speed and you pick one setting. Here the water leaves the lip as a coherent ribbon and arrives at the bottom as a scattered, much faster mess of droplets and spray, so a quarter second that keeps pleasing structure at the top will already be turning the base into featureless fog. That is not a fault. It is a compositional tool. If the base is what you care about, go faster and let the crown stiffen up. If the top ribbon is the subject, go slower and accept a soft plunge pool.
My honest default is not the full silk. Somewhere between 1/15 and 1/60 you get water that still reads as water, with visible strands and a bit of motion, rather than the smooth vertical smear that has become the default look of every waterfall on the internet. Shoot both. It costs nothing and you will not know which you prefer until you see them side by side on a real screen.
Aperture is doing two jobs. It controls depth of field, which matters when you have a fern frond thirty centimetres from the lens and a waterfall a couple of hundred metres away, and it controls how long the shutter can stay open in daylight. Around f/8 to f/11 most lenses are at their sharpest and you have enough depth to hold both planes. Push past f/16 and diffraction starts softening everything, which is a bad trade when your real goal was just a slower shutter. If you need more time than the light allows, a neutral density filter is the correct answer.
Support without a tripod is very doable here, because the railing is solid and it runs the length of the lookout. Set the camera body directly on the top rail with a folded cloth underneath, use the two-second timer, and hold your breath. That gets me repeatable half-second exposures. The stair landings on the loop also give you a flat surface at a useful height. If you do bring a tripod, keep it tight against the rail and out of the walkway, because this is a narrow path and it fills up.
| Look | Shutter | Aperture | ISO | Support |
|---|---|---|---|---|
| Full silk, classic | 1/4 to 1 sec | f/8 to f/11 | 64 to 100 | Tripod or rail brace, timer on |
| Half silk, strands visible | 1/15 to 1/60 | f/8 | 100 to 200 | Braced, breath held |
| Frozen droplets | 1/500 and faster | f/4 to f/5.6 | Auto, capped at 1600 | Handheld is fine |
| Overcast wide scene | 1/125 | f/8 | 200 to 400 | Handheld is fine |
| Forest detail, low light | 1/60 | f/4 | 400 to 800 | Lean on a rail post |
| Long exposure in bright sun | 1 to 4 sec | f/11 plus ND filter | 64 | Tripod only |
Is the second waterfall worth photographing?
Kahuna Falls, the cascade on the north side of the loop, is visible from a marked viewpoint but usually screened by vegetation. Treat it as a bonus telephoto frame rather than a second headline shot. It photographs best on a clear morning after rain, and the state publishes no official height for it.
Every week someone asks me why the other waterfall looks so far away and so small. The answer is geometry. Kahuna is a cascade rather than a free fall, it sits across the valley instead of directly opposite a balcony, and your view of it is a window through trees rather than an open frame. Nobody designed a lookout around it. You are peering through a gap.
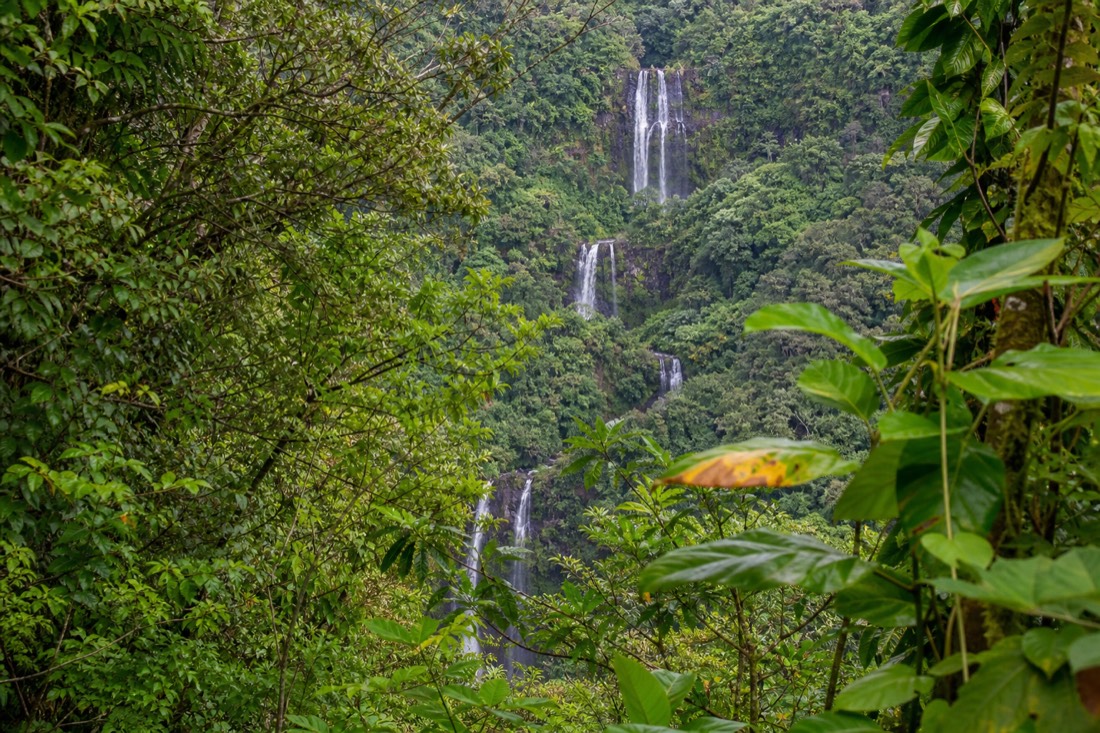
That gap is exactly what makes it a telephoto subject. At 100mm and up you can compress the tiers, stack the layers of the cascade against the valley wall behind it, and use the out-of-focus leaves at the edges of the gap as a natural vignette. Get the lens physically close to the foliage and the near leaves melt into soft green borders instead of distracting clutter. Shot that way it becomes a quiet, layered image with a completely different feel from the big drop, which is the honest argument for bothering.
Water volume decides whether it is worth your minutes. After a good Hamakua rain, Kahuna runs full and ribboned and reads clearly through the trees. In a dry stretch it thins to a modest trickle that will disappoint anyone who arrived expecting a twin of the main event. I do not oversell it to guests and I will not oversell it here. If the rain has been steady in the days before your visit, walk the north side. If the coast has been dry for a week, put your time into the main lookout instead.
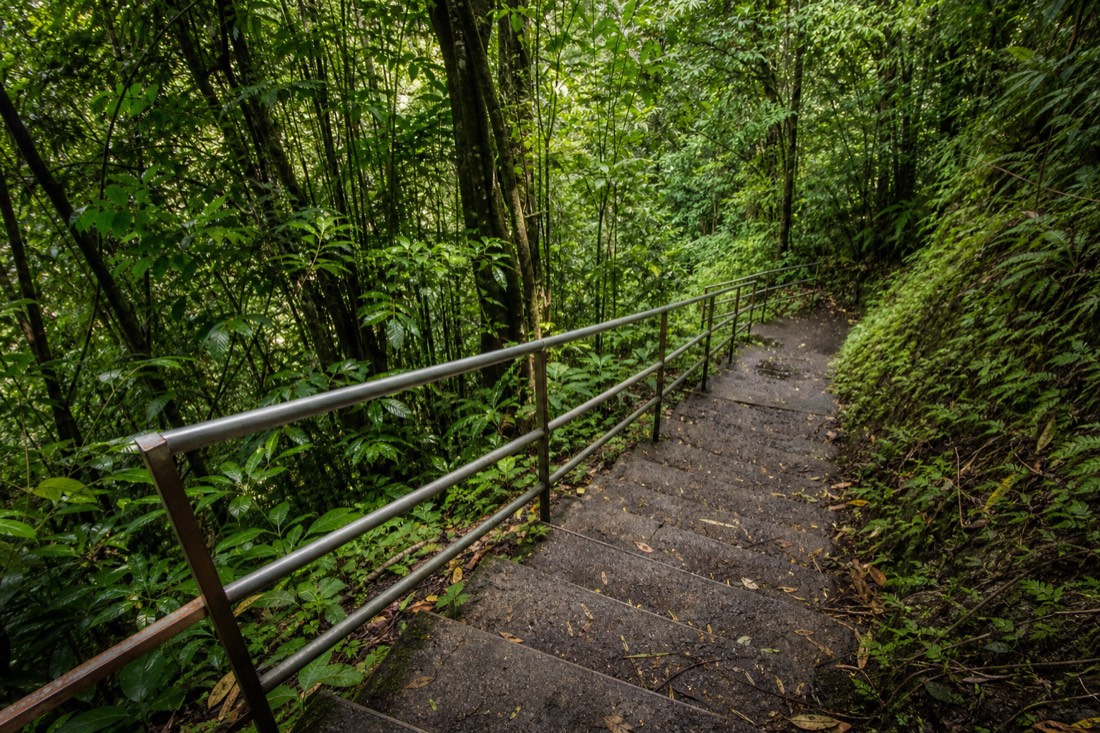
To reach the viewpoint, take the right-hand path from the first junction so you pass Kahuna on the way to ʻAkaka rather than doubling back. The loop has stair sections and the state describes it as requiring some physical exertion, so anyone weighing the full circuit against the shortcut should read the kids and seniors notes first. And if what you actually want is more than one serious waterfall in a day, the comparison in Rainbow Falls versus Akaka sets expectations properly.
That is also the case for a short-window morning. If you have half a day out of Hilo and want several waterfalls in it rather than one, the shorter Hilo waterfall circuit does that job without a long drive attached, and it is worth a look at the current half-day departures if your afternoon is already spoken for. The wider list lives in waterfalls near Hilo.
What can you shoot on the loop besides the falls?
The loop is a rainforest walk with two waterfall viewpoints attached. The bamboo stand and the banyan roots are genuine subjects, not consolation prizes, and both photograph best in exactly the flat overcast light that ruins the falls. On a grey day, shoot the trail first and the falls second.
The bamboo stretch is the one that surprises people. Tall culms lean in over the paved path from both sides and close overhead into a green tunnel, and because the light filters down through layers of leaf it arrives soft and directionless no matter what the sky is doing. Shoot it vertical, with the path running out of the bottom of the frame, and let the converging lines carry the eye. A long lens compresses the culms into a dense striped wall. A wide lens exaggerates the lean and makes the tunnel feel like it is closing.
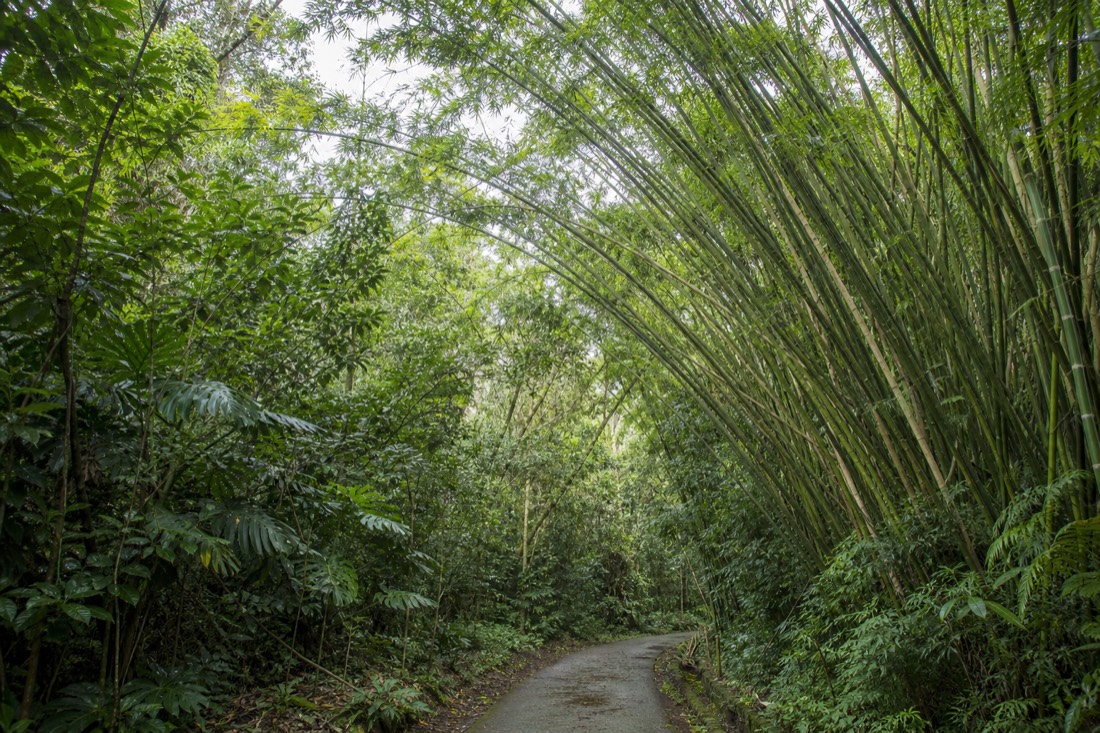
Bamboo also moves and makes noise, and neither of those helps a photograph directly, but both tell you something about the wind. If the culms are swaying hard, expect drift at the lookout and plan the wipe routine accordingly. If they are dead still, you can probably get away with a slower approach at the railing.
The banyans are the other subject worth your battery. Aerial roots drop from the branches in curtains, some reaching the ground and thickening into new trunks, and the whole structure is a mess of vertical lines with no obvious centre. That is the compositional problem. A wide shot of a banyan usually reads as visual noise, so the fix is to pick one element and commit: a single root against a dark gap, a cluster where three roots braid, the base where root meets soil. Get close and shoot at a wider aperture to separate your chosen line from the chaos behind it.
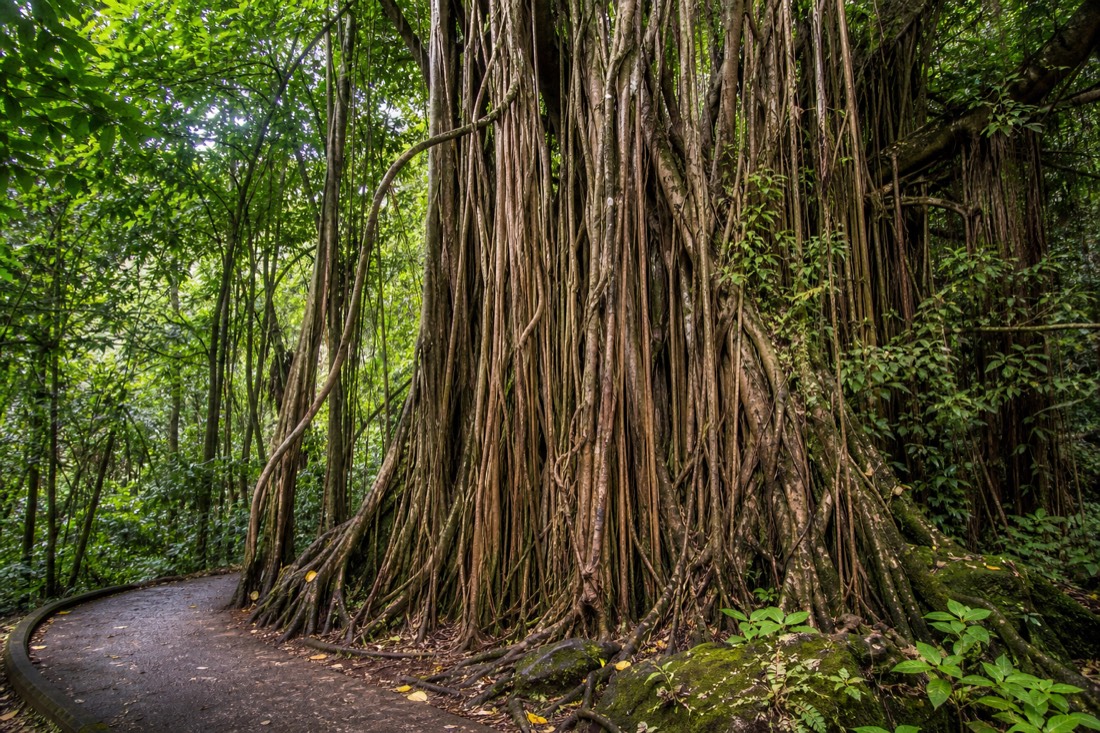
Between those two set pieces the path gives you fern understory, philodendron climbing the trunks, wet basalt, and the occasional torch ginger. All of it is small-scale work, which means it is the right thing to do when the sky is white and flat, and the wrong thing to do at 8:35am when your one good waterfall window is open. Order matters. Falls first when the light is soft, forest whenever the light is not.
Here is how the loop breaks down as a shooting walk.
| Stretch | What it looks like | What it gives a camera | Time to allow |
|---|---|---|---|
| Entry to first junction | Paved, gentle, planted | Warm-up frames, gear check | 3 to 5 minutes |
| Left path shortcut | Short, direct, some steps | Fastest route to the headline shot | 5 to 8 minutes |
| Right path, north side | Steps, dense canopy | Kahuna viewpoint, forest detail | 10 to 15 minutes |
| Bamboo stand | Green tunnel over the path | Vertical lines, flat-light saver | 5 to 10 minutes |
| Banyan section | Curtains of aerial root | Close abstracts, texture | 5 to 10 minutes |
| Main lookout | Fenced balcony above the gorge | The full 442-foot drop | 15 to 30 minutes |
| Return leg | Steady climb, steps | Trail context with a walker for scale | 5 to 10 minutes |
Should you still go when it is raining?
Yes, and often you should prefer it. Rain fattens the falls, saturates the greens, flattens contrast into an easy exposure, and empties the railing. Cover the camera, keep a dry cloth sealed away, and plan to shoot in the hour or two afterward when the water is highest and the sky is breaking.
The Hamakua Coast is wet by design and no forecast is going to hand you a guaranteed dry morning. Travellers who reschedule around rain here usually end up rescheduling into more rain, with a day burned. The better move is to bring the right cover and go anyway, because the pictures that come out of a wet morning are frequently the strongest of the trip.
What rain does technically is remove your dynamic range problem. Under a heavy grey sky the difference between the white water and the black gorge collapses to something a sensor holds without complaint, and greens go deep and even instead of glary. Colour saturates because everything is wet and the specular sheen is knocked down by the falling drops. You can shoot at base ISO with a slow shutter in the middle of the day, which you cannot do in sun.
Protection is the whole game. A purpose-made rain cover is best. A hotel shower cap with a rubber band over the lens barrel works better than it has any right to, an umbrella is excellent if you have a second pair of hands, and a plastic bag with a hole cut for the lens has saved more than one of my guests' cameras. Keep one cloth sealed in a zip bag as the emergency dry one and do not touch it for anything else, because in steady rain your working cloths go useless within minutes.
The hour after the rain stops is the prize. Water level peaks a little behind the rainfall, mist rises off the gorge as the air warms, and shafts of light start punching through the breaking cloud. I have watched guests who spent an hour grumbling under a shelter get their single best frame of the whole Big Island in the ten minutes after it cleared. There is a longer account of one of those mornings in rain at the falls.
Weather is also the strongest argument for handing the driving to somebody else. The coast road in heavy rain is slow, and from the resort side it is a long way to come for a forecast you cannot control. Photographers staying on the Kona and Kohala coast who would rather spend that energy on the frame than the wheel can look at the waterfall day that starts on the resort coast and see how the route is built.
| Condition | What the falls do | What to shoot | Setting nudge |
|---|---|---|---|
| Heavy rain | Full, loud, brown-tinged | Wide scene, cover on, short visit | 1/125, ISO up, protect gear |
| Light drizzle | Strong flow, soft light | Everything, best all-round day | 1/4 sec silk at base ISO |
| Overcast dry | Normal flow, even light | Falls plus forest detail | f/8, polarizer on |
| Clearing after rain | Peak volume, rising mist | Mist shafts, high-contrast drama | Bracket, meter for highlights |
| Bright sun, morning | Normal flow, shade in gorge | Headline frame before 10:30 | Minus two thirds of a stop |
| Bright sun, midday | Blown crown, black base | Bamboo, banyans, close detail | Abandon the falls, shoot forest |
| Dry spell, any light | Thinner column, Kahuna weak | Tight crops, gorge texture | Longer lens, skip Kahuna |
What gear survives Hamakua humidity?
Carry less than you think and keep it dry. Two or three microfiber cloths, a lens hood, a polarizer, a rain cover, and a small tripod cover everything this park asks of you. The real enemy is condensation when you step out of an air-conditioned car into warm wet air.
Condensation is the failure nobody plans for. Your camera has been sitting in a cold rental car for the forty minutes up from Hilo, then you carry it into air that is warm and close to saturated, and moisture instantly forms on the cold glass and, worse, inside the body and on the sensor stack. Wiping the outside does nothing for the fog you cannot reach. The fix is trivial and takes planning: turn off the air conditioning for the last ten minutes of the drive, or leave the bag zipped for ten minutes after you park so the gear warms up slowly inside it.
Beyond that, the list is short. A lens hood earns its place every single visit. A polarizer earns its place on wet foliage. Cloths are the highest-value item per gram in the entire bag. A small travel tripod is worth carrying only if you actually intend to work slow shutters for twenty minutes, and if you do not, the railing is genuinely good enough. Spare batteries matter less here than at higher elevations, though cool damp air still drains them faster than you expect.
What I would leave in the car: a heavy full-size tripod, a bag full of primes you will not swap in mist, and a drone. Changing lenses at the railing with drift in the air is how sensors get spotted, and every spot lands on a bright white area of the frame where it shows worst. Pick one zoom that covers wide to short telephoto, put it on before you leave the parking lot, and leave it there.
Silica gel packets in the bag are a cheap and slightly underrated habit on this coast. Whatever you shot with today comes back damp, and gear that sits damp in a closed bag overnight in a humid room grows problems. Open everything at the hotel, take the battery and card out, and let it breathe. The cost guide covers the fee side of the visit, and the perfect day plan shows where this stop sits in a full itinerary.
| Item | Why it earns its place | Budget alternative |
|---|---|---|
| Microfiber cloths, three | Wipe before every sequence, damp ones are useless | Clean cotton shirt corner, worse but workable |
| Zip bag or dry pouch | Keeps one cloth genuinely dry all day | Resealable sandwich bag |
| Lens hood | Physical shield against drifting spray | Cupped hand over the top edge of the lens |
| Rain cover | Real protection in a Hamakua shower | Shower cap plus a rubber band |
| Circular polarizer | Kills glare on wet leaves and basalt | Skip it, fix contrast in the edit |
| Small travel tripod | Half-second exposures without shake | Brace the body on the railing, timer on |
| Neutral density filter | Long exposures once the sun is up | Shoot slow before 9:30am instead |
| Silica gel packets | Dries the bag out overnight | Leave everything open at the hotel |
Can you fly a drone here?
Hawaii's state parks regulate drone use, so check the current rules on the official park page before you plan any aerial shot. Beyond the regulations, the fenced gorge, dense canopy, and narrow busy trail make this a poor launch site anyway. Build your shot list around the lookouts instead.
I understand the appeal completely. It is a 442-foot free fall into a gorge and the aerial version of it looks extraordinary in your head. My answer to guests has stayed the same for years: the rules for state parks are set by the state, they change, and the only source worth trusting is the official DLNR park page rather than a forum thread from four years ago or a video description that never says where it was filmed. Read it before you travel, not in the parking lot with no cell reception.
Then think about the site itself. The trail is a narrow paved loop with a fence on the gorge side and other visitors on it all day. The canopy is dense and closes overhead across long stretches. The gorge is a walled slot with unpredictable air moving up it, which is the same drift that keeps landing on your lens. Even in a location with no restrictions at all, this is a hard place to launch, hard to keep line of sight in, and unpleasant for everyone else on a short path.
There is also an honest craft point. The aerial view of a waterfall in a slot gorge is often less impressive than people expect, because from above you lose the one thing that makes a 442-foot drop feel tall, which is a vertical frame with a top and a bottom. The lookout gives you that for free. Shoot vertical, include the plunge pool, and the height reads.
If what you actually want is a perspective the trail cannot give you, there is a real ground-level answer nearby. The zipline course a few minutes from the park runs over KoleKole Falls and puts you in the air above forest and moving water on a cable rather than a controller, which is a different photograph and a legitimately good one for an action camera or a strapped-down phone. Details are on the zipline page, and you can check times and availability if you want an afternoon slot after a morning at the falls.
Can a phone camera handle this?
Yes, and here it competes with a real camera more than almost anywhere else. Night mode gives you a hand-held long exposure, computational HDR handles the gorge contrast well, and the wide lens loves a fern foreground. Wipe the glass constantly and be careful with portrait mode.
Modern phones do three things that suit this scene. They stack frames, which is effectively an automatic bracket across the exact dynamic range problem the gorge creates. They run night mode, which is a multi-second hand-held exposure that will smooth falling water without a tripod. And they carry an ultrawide lens that gets close enough to a fern frond to build real depth in a frame, which is exactly the move I recommend at the railing.
Night mode is the trick most people never think to use in daylight. Prop the phone on the railing, tap the night or long-exposure mode if your model allows it in bright conditions, and you get silk without carrying anything. On phones that resist it in daylight, the built-in long-exposure effect applied to a live photo does the same job after the fact. Either way, steady the phone against something solid, because hand shake at a second of exposure ruins the frame no matter how good the stabilisation is.
The pitfalls are specific. Portrait mode reads a waterfall as background and blurs it, which is precisely wrong when the falls are your subject, so turn it off unless you are shooting a person at the railing. Aggressive automatic HDR sometimes lifts the shadows so far that the picture looks artificial and flat, so pull the exposure slider down with a finger drag before you shoot. And the phone lens is small, uncoated by any hood, and sits flush with a smooth back that collects mist faster than any camera front element. Wipe it before every single shot. I mean every shot.
One more advantage worth naming: a phone is easy to protect. It goes in a pocket between frames, it survives drizzle, and there is no lens change to expose a sensor. On a genuinely wet morning I have watched phone shooters walk away with more keepers than the person carrying two bodies, purely because they kept shooting while the other packed up. If you only have a phone, you are not at a disadvantage at this park. You are at an advantage on the bad-weather days.
| On a camera | Phone equivalent | Watch out for |
|---|---|---|
| Slow shutter for silk | Night mode or long-exposure effect | Needs the phone braced on the rail |
| Exposure compensation | Drag the exposure slider down before shooting | Resets between shots on some models |
| Bracketing for dynamic range | Automatic HDR, leave it on | Can flatten the image, pull exposure down |
| Wide with fern foreground | Ultrawide lens, held low and close | Edge distortion, keep the falls centred |
| Telephoto for Kahuna | Digital or 3x lens, tripod-steady | Detail falls apart past 3x, crop later |
| Raw capture | ProRAW or raw mode if available | Larger files, worth it for shadow recovery |
| Lens hood and cloth | Wipe the glass before every frame | Flush lens collects mist very fast |
The falls have been photographed millions of times and yours can still look like nobody else's, because almost nobody works the railing, almost nobody arrives at opening, and almost nobody bothers to wipe the glass. Get there at 8:30, keep the cloth moving, underexpose the white water, and give yourself an hour rather than fifteen minutes. If you want somebody else watching the clock and the coast road while you concentrate on the frame, a guided day handles that part while you concentrate on the light.
Guided days built for photographers
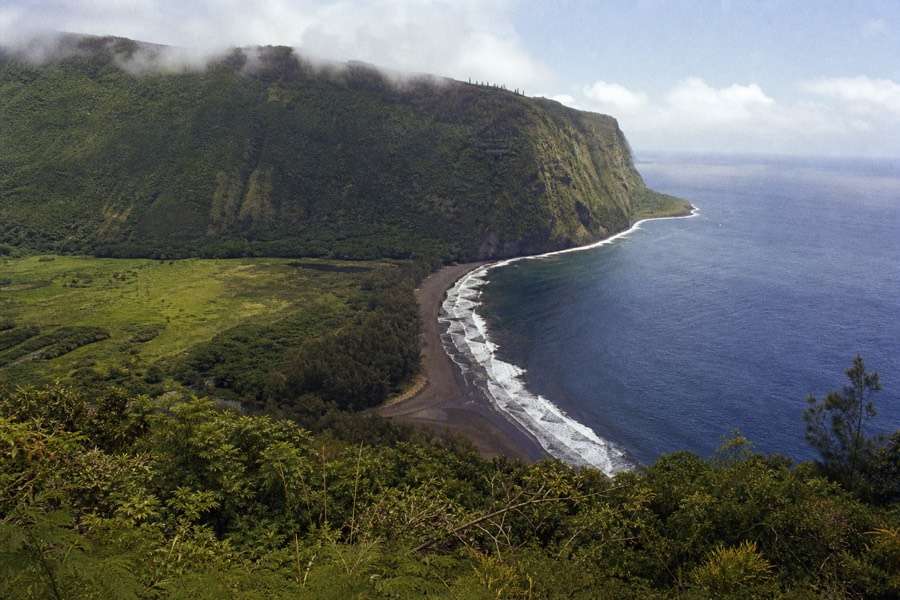
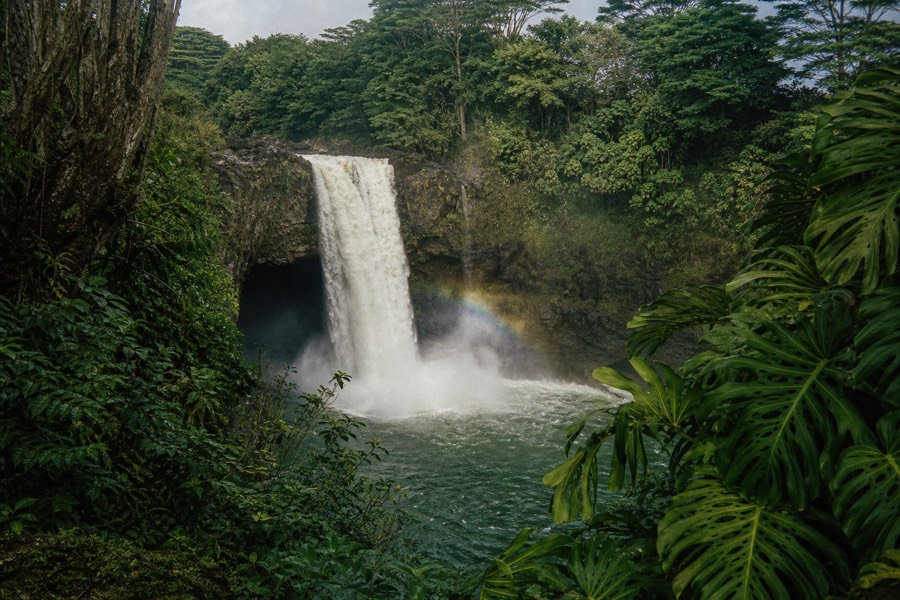
Akaka Falls, Volcanoes & Hilo day (full hour at the falls)
7 to 8 hours
from $179per person, varies by date Check availability →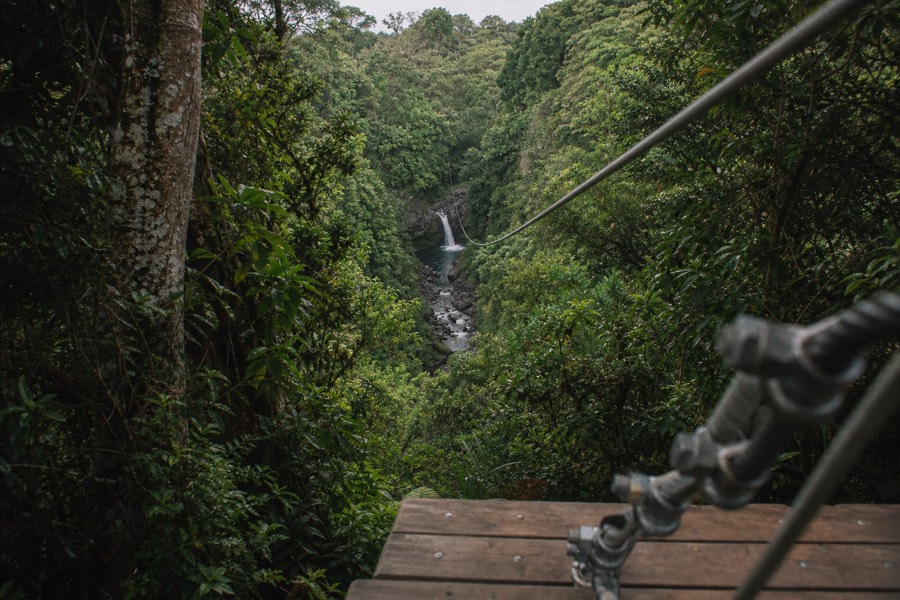
Zipline over KoleKole Falls, next to Akaka Falls
About 2.5 hours
from $246per person, varies by date Check availability →